Eyebrow tinting at a salon can cost a pretty penny. Luckily, there’s a super-easy way to do it all on your own at home!
My eyebrows have always been on the lighter side, but I noticed them fading away even more over the past five years or so. At first, I used various makeup products to fill them in. Unfortunately, that also led to some awkwardly overdone brows and sweaty stains leaking into my lashes on more than a few hot days.
That’s why I was so relieved to find a semi-permanent solution I could use without having to worry about making a salon appointment.
The secret: beard and mustache dye! I know it sounds strange and I definitely didn’t expect it to really make that big of a difference. That said, I’m not exaggerating when I say the men’s product totally changed my life.
Take a look below to see an easy step-by-step guide for at-home eyebrow tinting.
And be sure to Liked Video the genius technique with your friends on Facebook!
How Brow Tinting Works

As you can see, it had been quite a while since I spruced up my brows with tint before this round.
I definitely got lazy about the upkeep, but the results usually last me about two to three weeks. The photo above is after about two or three months of my brows going au naturel.
My At-Home Tinting Products
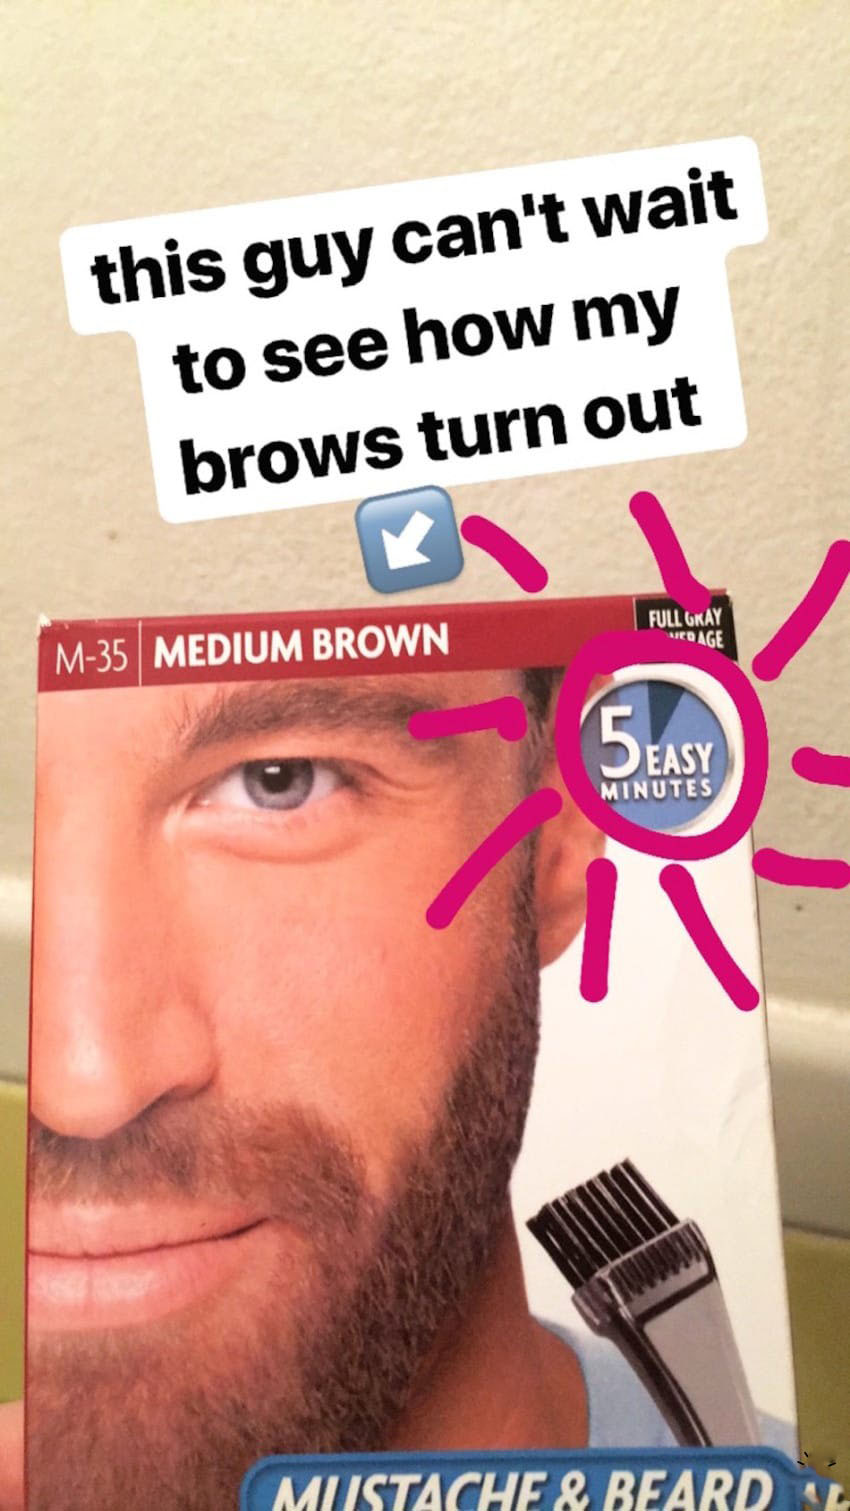
Guess what? Just For Men products are not just for men!
Since it’s already formulated to be used on the face, there’s nothing saying it exclusively has to be done with mustaches and beards. Of course, if you have sensitive skin, you’ll want to test out the dye on a small patch to see how you react before moving forward.
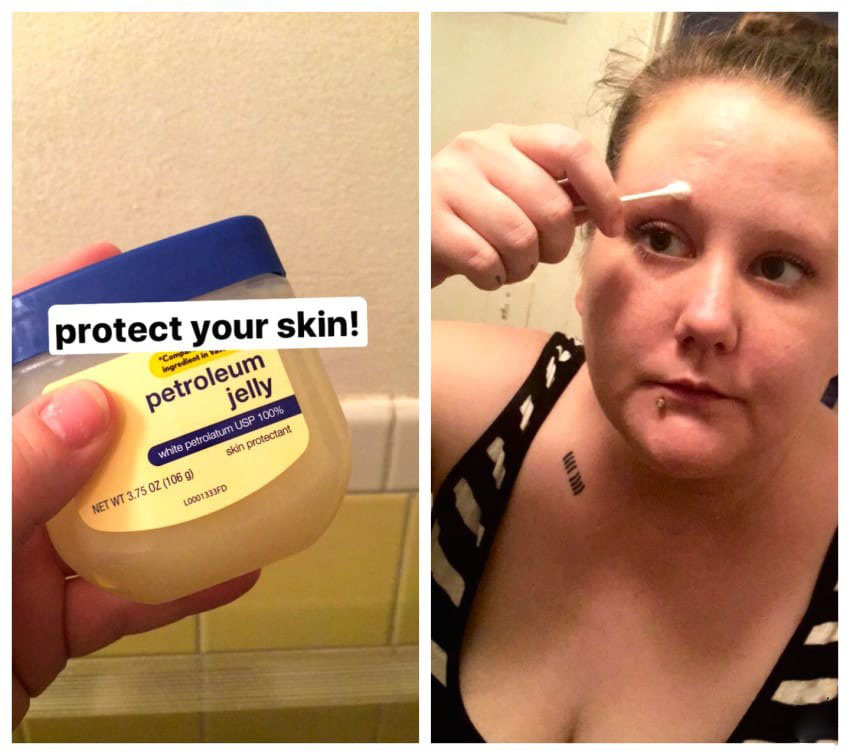
I always go with this medium brown fella. You’ll also want to grab some petroleum jelly to protect the skin around your brows as you tint them. Cotton swabs will come in handy, too.
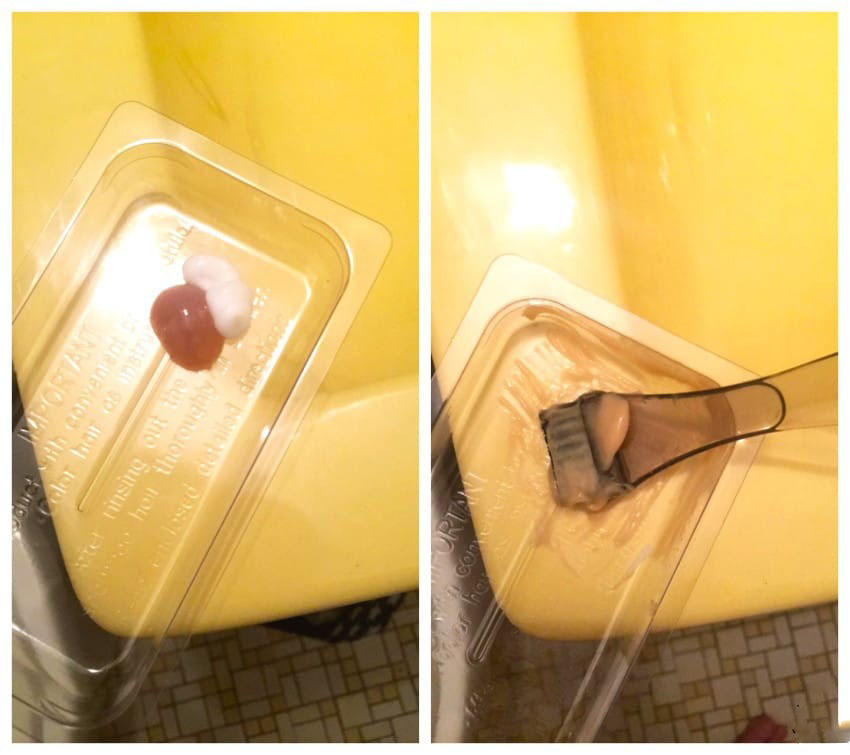
Step 1: Mix The Dye
You won’t need much, which is handy for having plenty leftover for any touch-ups or your next round of tinting in a few weeks. Just be sure to make a note of the expiration date!
Squeeze out an equal amount of the dye and the developer onto the tray, then mix with the brush.
Step 2: Use Petroleum Jelly To Protect Your Skin
Believe me, I skipped this step a few times in the past and ended up looking a bit more like Groucho Marx than I had intended.
The dye will always try to spread onto your skin as it’s doing its work, but a thin layer of petroleum jelly will help keep too much of it from seeping where it doesn’t belong.
Step 3: Apply The Dye To Your Brows
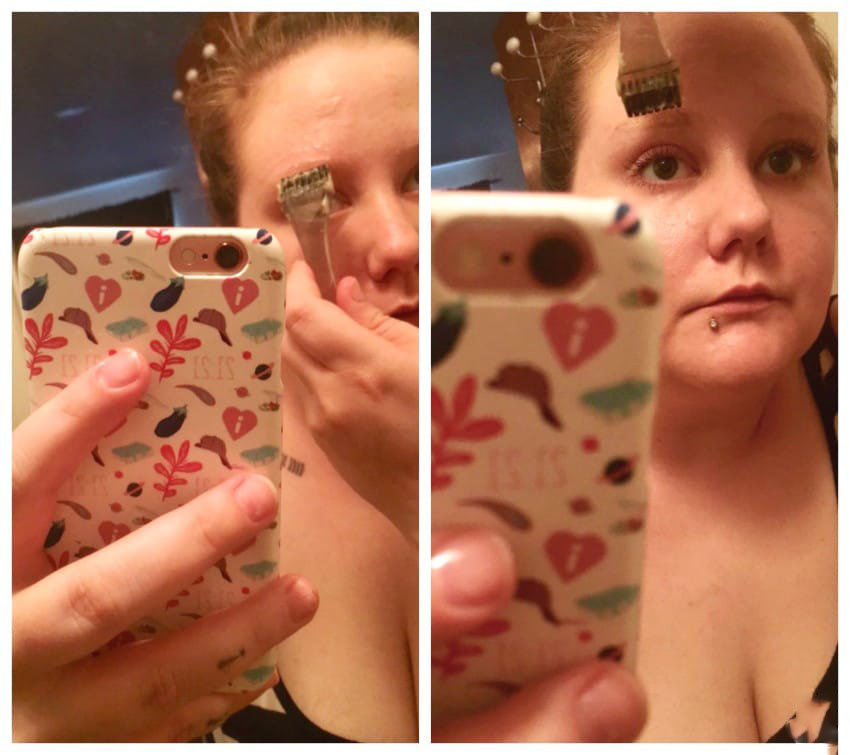
This is pretty self-explanatory, but you will want to be very careful with the dye as you smear it on your face.
The brush that comes with my Just For Men dye is perfect at controlling exactly how much of the mixture I want. It’s also great at applying it in the correct shape. You can even use the bottom to scrape away any dye that strays too far while applying.
Warning: there’s a good chance you will end up with some dye on your hands. I never really mind since it usually fades away pretty quickly. That said, grabbing a pair of gloves might be a good idea if it’s something you’d like to avoid.
Step 4: Set A Timer For 5 Minutes
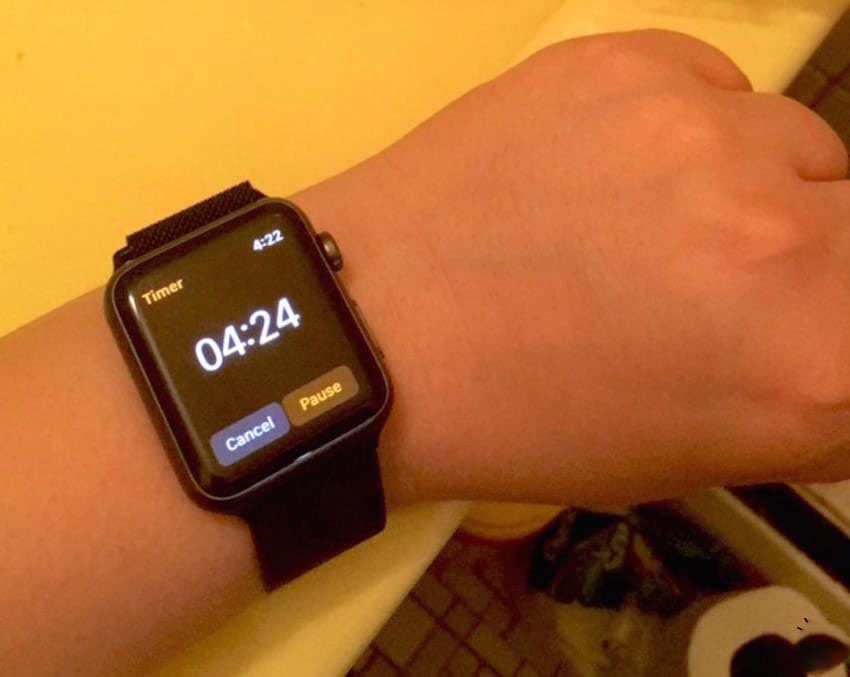
I’ve tried keeping track just by looking at my clock in the past, but you’d be surprised by how fast those five minutes fly by.
After accidentally leaving it on far too long one time, now I always use a timer on my phone or watch.
Step 5: Keep A Close Eye On It While It Works
As I’ve said, the dye likes to spread around. The petroleum jelly will help avoid most awkward stains, but there’s a good chance you moved some of that around, too, while applying the dye.
You don’t have to stare in the mirror the whole time, but checking every now and then is a good idea.
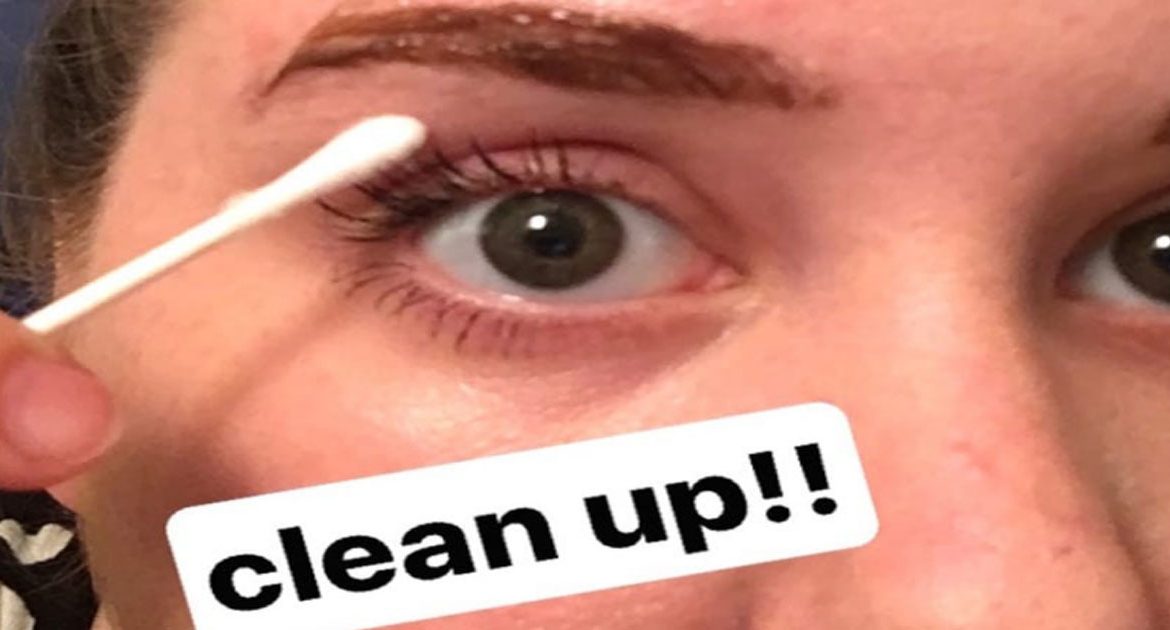
Step 6: Use A Cotton Swab To Clean Up Any Spreading
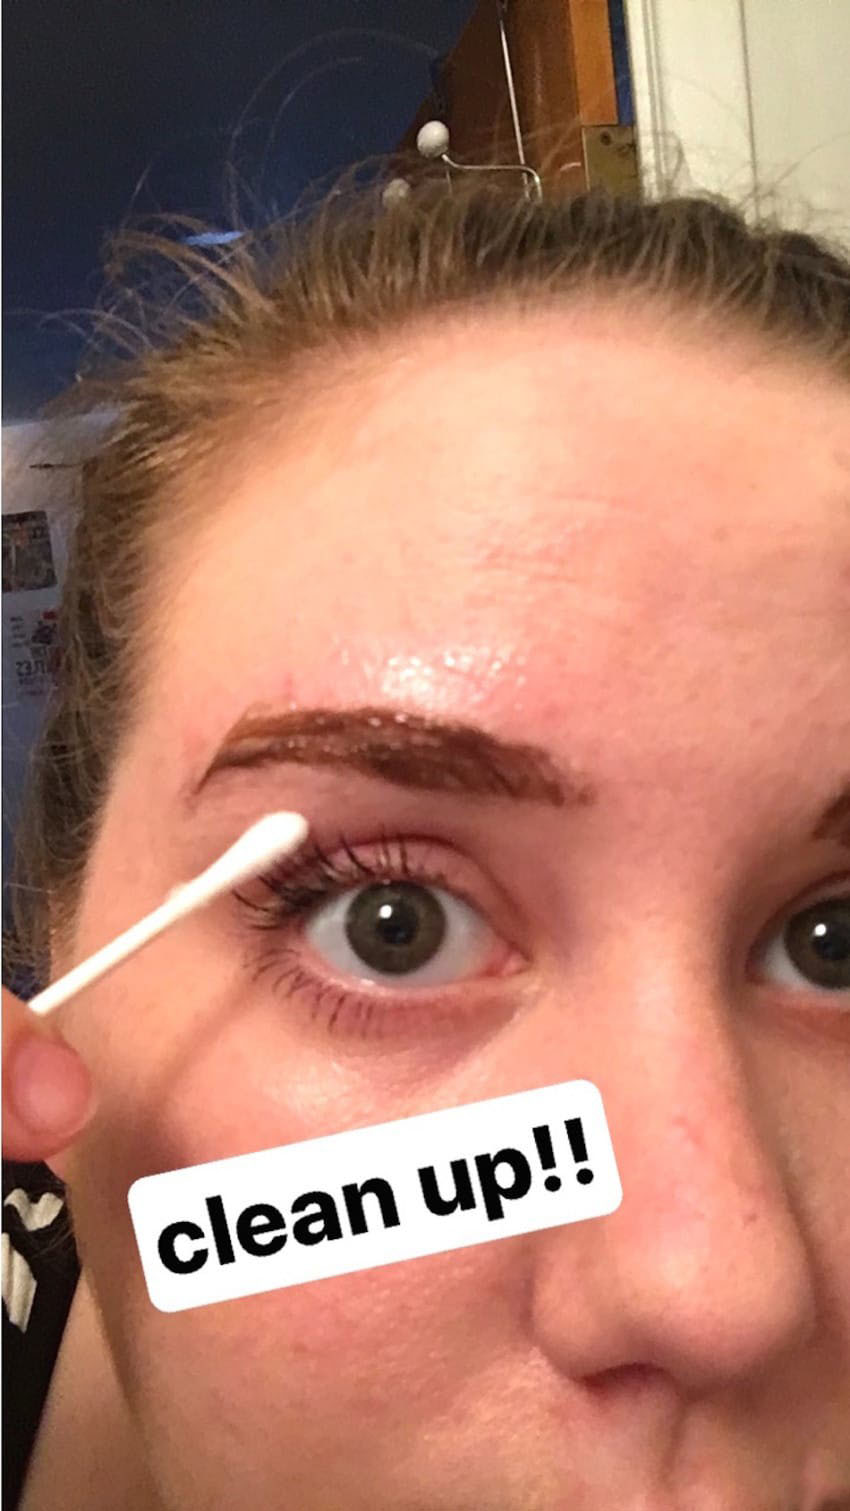
If you notice dye leaking over to an area you don’t want it to be, just quickly swipe it away with a cotton swab and you’ll be all good.
Step 7: Rinse Off The Dye
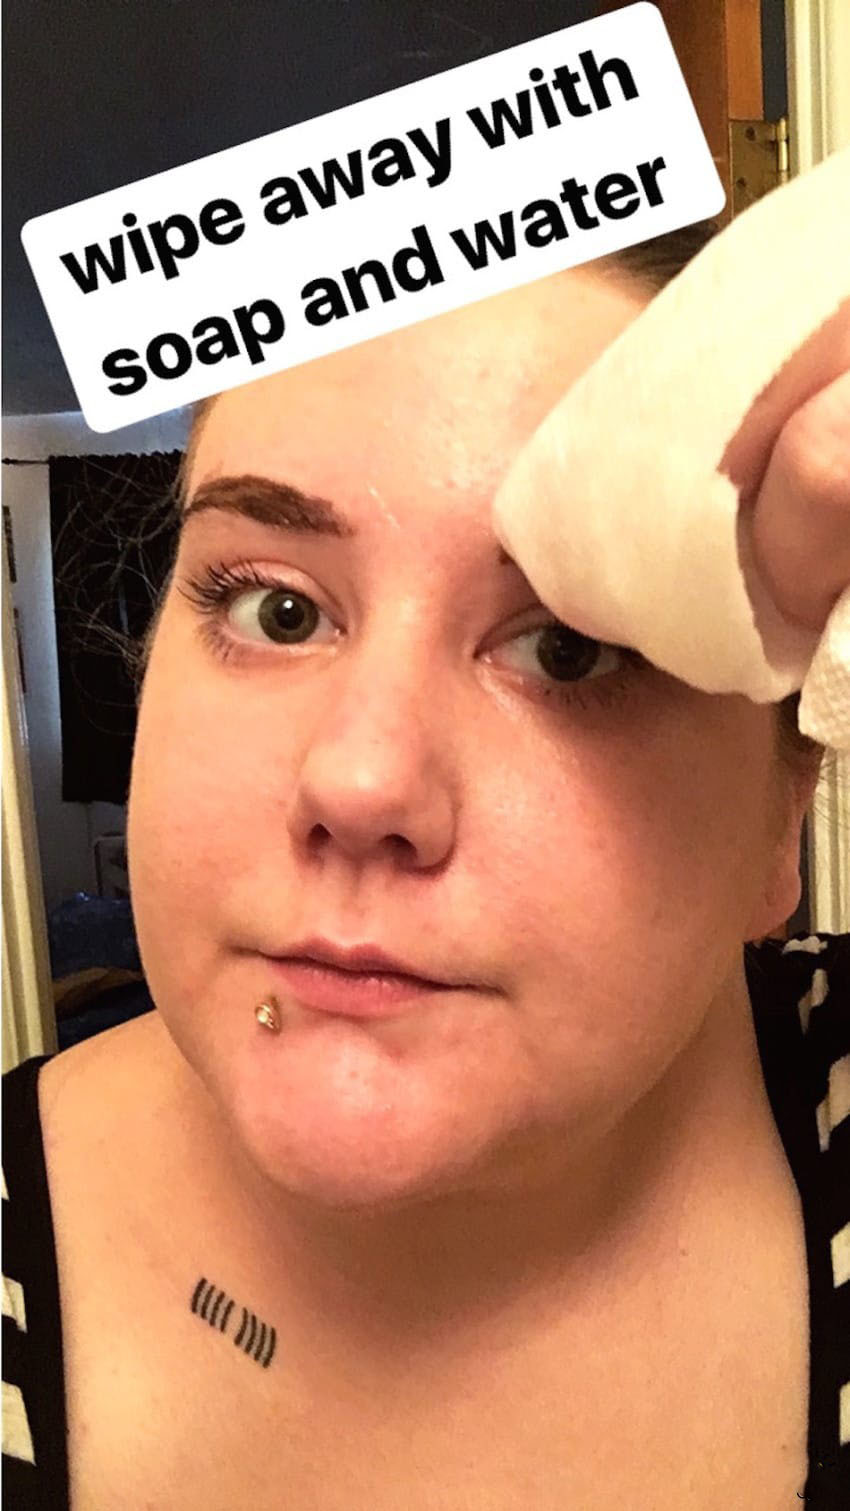
Grab a paper towel or rag that you don’t mind getting messy and soak it with some regular soap and water.
There’s no need to be aggressive, just gently wipe the dye away and give your brows a good final rinse once it’s all off.
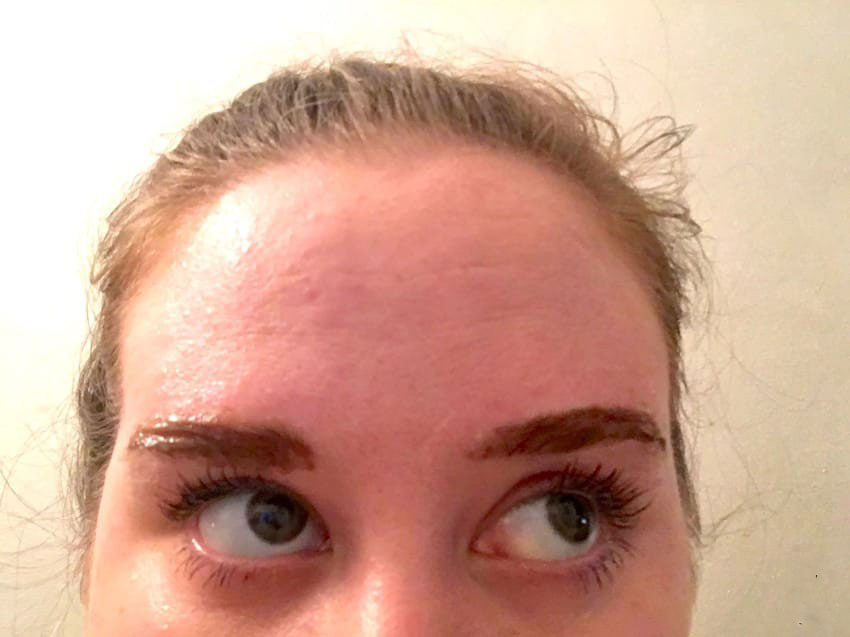
Final Result
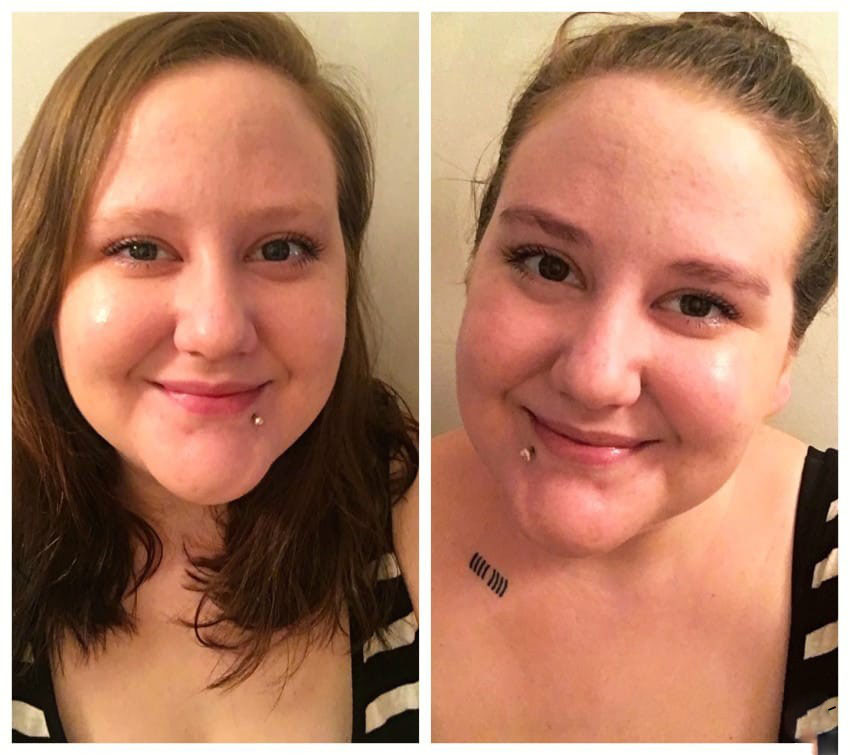
Drastically more noticeable brows for days!
You can always apply another round of dye for a couple minutes if the first round didn’t get them quite as dark as you’d like.
Otherwise, it’s time to snap a selfie and show off your amazing at-home eyebrow tinting skills!
You’ll also be able to go at least a couple weeks without having to worry about your brows melting away or accidentally smudging the makeup you would usually use to fill them in.
Would you ever try tinting your eyebrows at home? Know someone who could use this clever trick for their brows?
Be sure to Liked Video all the steps with your friends on Facebook!