You can use clothespins to… well, the name says it all. But now that Christmas is round the corner, you can make great use out of these helpful little fasteners in other ways. If you’re thinking about how to decorate your home over the holiday period, these practical clothespin ideas are just the solution.
Tip: only use clothespins made out of wood for these hacks, not plastic ones.
1.) Star-shaped coasters
You’ll need (for each star):
- 22 clothespins
- hot glue gun
- acrylic paint
To begin, remove the metal wire that keeps the two parts of the clothespin together. Then use the hot glue gun to stick the two halves of the clothespins together on their flat sides. Once you have 22 of these clothespin pairs, take the first one and apply some glue on the bottom third of the non-flat side of the clothespin. Now stick another clothespin pair to the glued surface so that the two clothespin pairs are stuck together at their pointed ends.
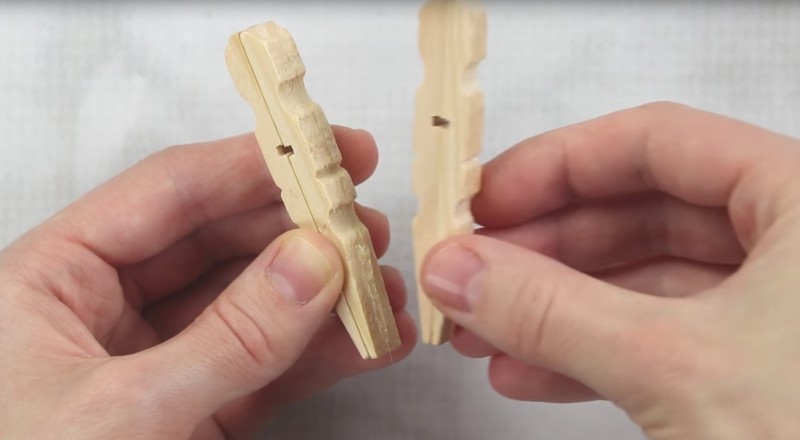
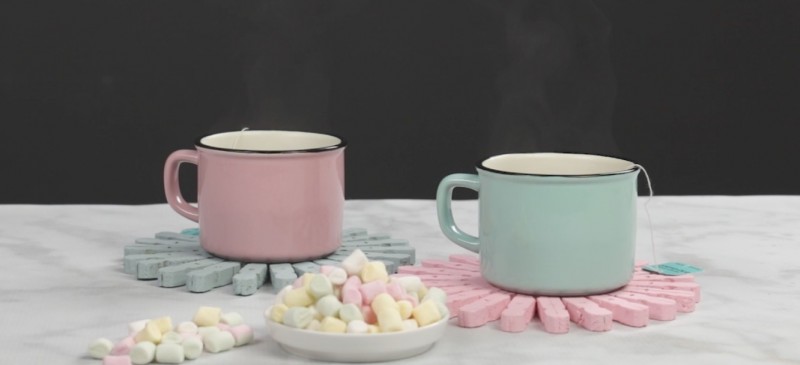
Now repeat this process until you create a circle of clothespins that looks like a star. Leave the glue to completely dry and paint your star in a color of your choice.
The star works particularly well as a coaster for your hot drinks and mulled wine.
2.) Napkin holder
You’ll need:
- 24 clothespins
- hot glue gun
As in the first hack, remove the metal wire from all the clothespins. This time, glue the two halves of a clothespin together along the top edge lengthways. Repeat this step one more time — these two structures will provide the support for your napkin holder later.
Similar to hack #1 again, glue 20 clothespin halves on their flat sides and stick the pointed ends together to create a fan shape. Here’s the difference from the first hack — now stick two clothespin halves with the flat side glued to the outside of the semi-circle; it should look like the structure in the image below. Make the exact same fan shape a second time. These two semi-circles will become the side walls for your holder.
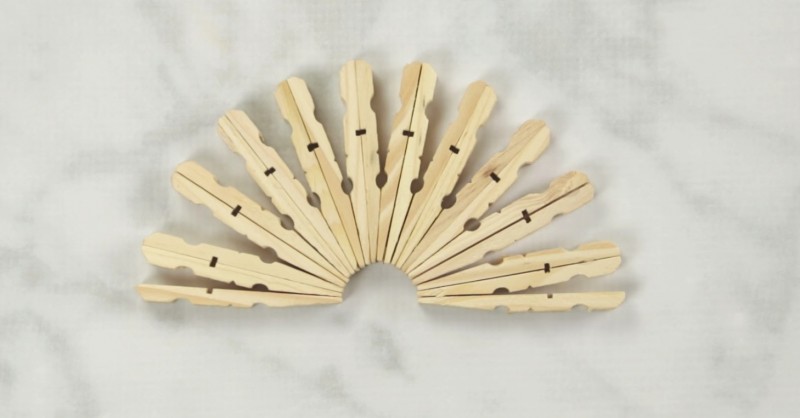
You should now have four individual glued together structures in front of you: the clothespins glued along their top edges and the two semi-circles. Now apply some glue to one side of the two lowest outer clothespins on one of the semi-circles.
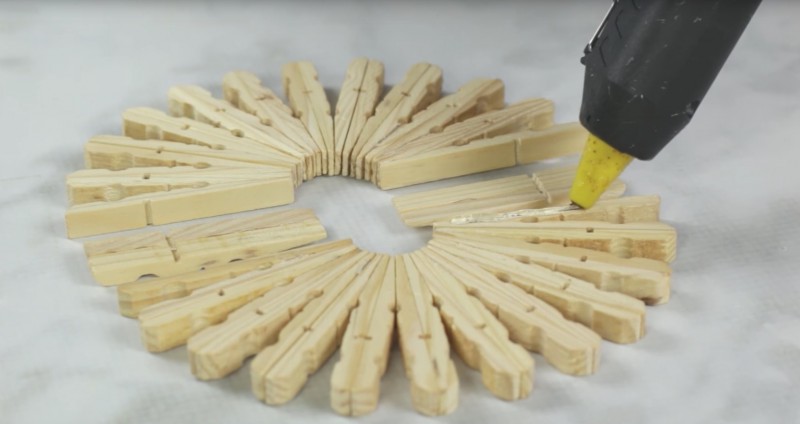
Next, glue the smaller constructions from step one onto these two glued areas. Our holder is now starting to take shape.
In the next step, apply some glue to the other side of the smaller constructions and attach the second semi-circle to them so that it’s facing the first one.
Once the glue is dry, you’ll have a useful kitchen utensil that really captures the Christmas spirit.
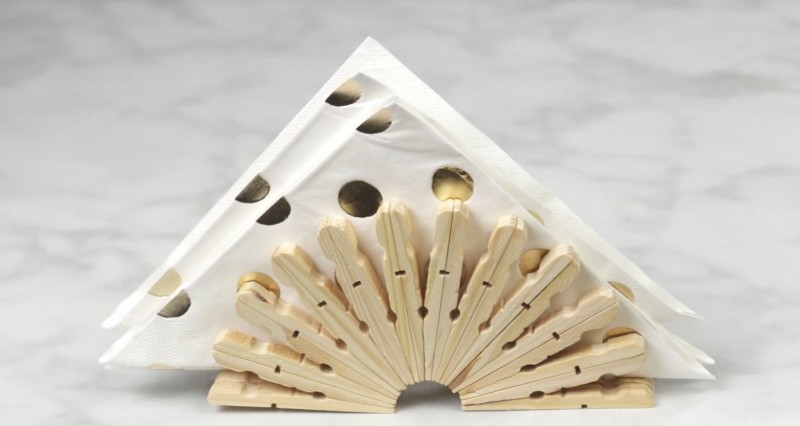
3.) Christmas tree decoration: stars and trees
You’ll need (for one tree and one star):
- craft felt, e.g. in gray and light blue
- golden gift ribbon
- 2 clothespins (tree), 6 clothespins (star)
- hot glue
As in hacks #1 and #2, you’ll need to remove the metal wire from the clothespins. Afterwards, cut out small circles and stars from the felt. For the tree, you’ll need one felt star; the star requires one felt circle and one felt star.
Start off with the tree. Cut off around 4 inches of gift ribbon, make a loop with it, and stick the ends together. Now glue the ribbon ends to the pointed end on the flat side of a clothespin half. Then apply glue to the entire flat side along the clothespin, as shown in the image.

Now glue the flat side of the second half of the clothespin to it and press both parts together until the glue has dried.
Now reach for the next clothespin halves. Glue them to your structure as shown in the image below. The loop will be used to hang the decoration on the tree later.

Next, apply some glue just below the top of the triangle and stick a felt star to it. Now you have a festive mini-tree you can hang from your larger one.

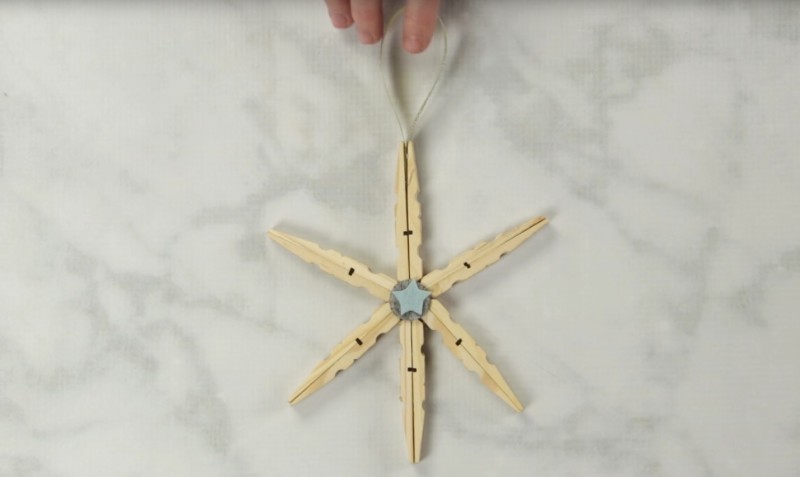
Let’s now turn our attention to the star. To begin, proceed as you did for the tree by gluing the flat sides of two clothespin halves with a loop of gift ribbon in between.
Glue the rest of the clothespin halves together on their flat sides. Arrange them so that the rounded ends of the clothespin pairs are facing inward. It’s best to do so on an impervious surface as the «hole» in the center needs to be filled with hot glue.
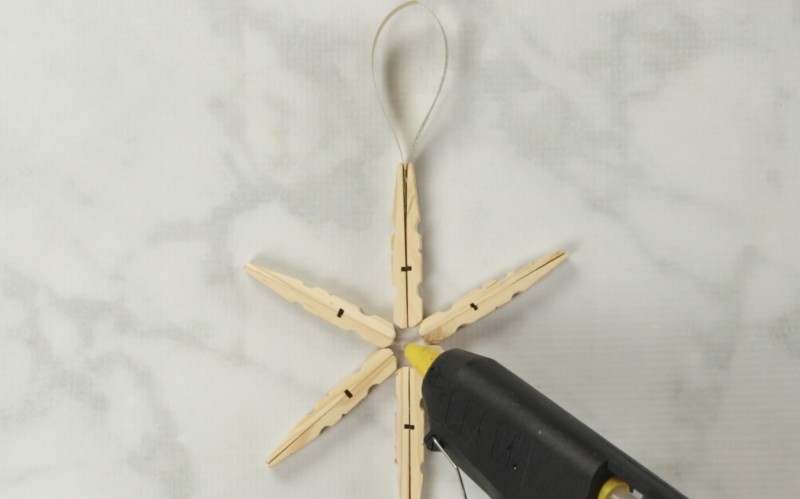
The glue in the center not only holds your star shape in position, it also allows you to attach some felt decoration to it. Your second tree decoration is now done!
It really is that easy! And these festive decoration ideas will make a nice change from the samey fairy lights and baubles on the your tree, right?
